Monday, September 29, 2008

Countdown to Pikelween: Decor

So, I am prepping for my big halloween bash...my last name is Pikel (PIE-KEL) and 5 years ago, we dubbed this party Pikelween, not even sure why, but it stuck...it is kind of funny to hear other people call it Pikelween instead of Halloween...

Here are some of my favorite things from Pikelween's past:


My Martha witch is in the front yard. My husband groaned a bit when I asked him to help me make her, but he loves her now. She just looks so cool! Last year, my awesome neighbor and friend Heath put this high power flood light behind her and coupled with the $20 fog machine we picked up at Walmart a few years ago...it was so awesome!!


I had this big blank wall last year, so I printed and cut out Pikelween in big creepy letters (8.5x11 sheets of regular paper).


These are a Martha Idea. I bought these cute little glass eyes at Dept. 56 last year, and they fit perfectly in the holes I cut for the eyes...totally transformed them. They have so much expression!


I saw the Martha caution labels at Michaels, and they were so simple, so I just made my own and printed them on sheets of label paper.


You can see the letters I cut out in the background of this photo. I had a black light in the light above them...so the edges of the letters were glowing. So effective and it was FREE!


The wreath I made for my front door.


My gorgeous glittered pumpkins. I LOVE THESE. They are so sparkly and l can't recommend enough, if you haven't gotten on the glitter bandwagon...get on it! So worth it, and Martha's glitters are just like diamonds! I am addicted!


I found this sign at HomeGoods last Halloween and I use it to theme my bathroom as the Bat Room, I put bat cut outs all over the walls. This year, I am putting up glittered bats! That boa wasn't part of my decor...just a reminent of someones costume...oh and don't you love my Pikelween towel...a gift from my dear friend Dena at Written In Thread. She actually made me a few of these and they were the gifts for our costume contest. They didn't have Pikelween on them, but were Halloween themed...so cute. People loved them.


I have been moving more towards Halloween decor that looks more like real items you would have in your house already...I stopped going to those pop up Halloween shops...they are just gory and everything looks cheap. I found one of the skulls in this pic at Target, and the other at HomeGoods, both under $10. The little skull under glass was a bit pricy, but I had to have it! I is actually a salt and pepper set! It is from Dept. 56. I love him!

I am working on a website that should be up in a few days with all my pics...I will be sure to post the link so you can see the amazing costumes!

Cupcake Stand

I just saw this on the Cupcake Goddess site, and it is beautiful. What I really like is the way she is displaying the cupcakes!


They look like small rounds of glass, I have seen these at Pier One, where you can buy a piece of glass to set on top of a table...and they are propped up with glass vases with glass fill. This is a genius idea!

I can totally see my chocolate fountain on top of this display, I would only do 3 tiers, and put all of the dippings all around. I particularly love the fact that it frees up the edges of the table, so you can actually decorate it.

Nice job Cupcake Goddess! Thanks for sharing!
Marcie

Sunday, September 28, 2008

Ina is Back!

If you have been wondering where the heck Ina Garten has been, you can woner no more! A new season of the Barefoot Contessa begins October 18th on Food Network!


Ina is my true culinary hero! I love her so much and I am so glad she is back. Once I wrote her an email, and she wrote me back...I almost died! haha! I think that if I met her, I would actually speak, unlike the time I met Martha...I was frozen! I will tell that story sometime. :)

Anyway, be sure to set your DVR's for the new season!

Blogstar

My brother ichatted me a some tees he thought I would like..they made me laugh so I had to share with you!


Dena, you have to make this!


You can find these here:
Signals
CafePress

Saturday, September 27, 2008

Ragout Stew

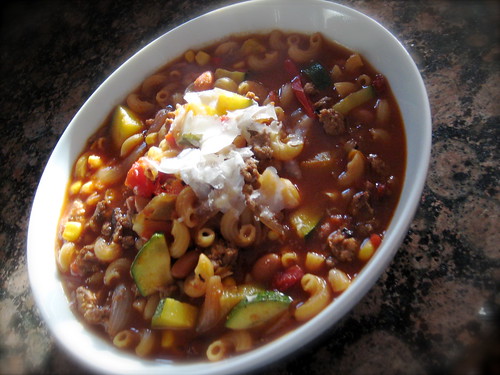
I saw a Rachel Ray episode where she made a stew using sausage and peppers as the base, then added chicken stock to make it a stew. The recipe began very similar to the way I start my weekly pasta dish:

I use ground turkey everytime
I add a whole sliced onion and 3 cloves garlic finely diced
If I have any zucchini, that goes in, same with bell peppers (only yellow, orange or red, I don't like green very much) and mushrooms. I let all of the veggies cook and get good color on them. I add some crushed red pepper, dried oregano salt and pepper. I then add a can of crushed tomatoes...or jarred pasta sauce.

I let that simmer together on low for while my pasta cooks, then I add it all together and dinner is served.

Anyway, I thought I could take my pasta recipe and make it into a stew like Rachel

Ragu Stew

To make this stew, I made my sauce as described above...then added chicken stock, a can of corn, a box of elbow macaroni, and to make it more like Pasta Fagioli, a can of white beans. I served it with shaved parmesan on top. This could easily be made vegetarian by leaving out the ground turkey.

So good!

Chic Jello Shots

Can you believe that these are jello shots? How beautiful are these...I am scouring the web for great ideas for Halloween...I am thinking I can make these with a purple color so they are almost black, or an orange...love the presentation here!


As seen on BRIDES.COM.

Easy Flower Arranging

Ok this is my kind of centerpiece! How cute is this? And I know I have said that I suck at arranging flowers, so I can totally do this. This is from the Rachel Ray website.


Take some wine goblets, put a few pretty flowers underneath, set a candle on top...SO PRETTY AND EASY!

I haven't always been a big fan of Rachel's but, my husband took me to lowes one to many times and I took a detour to the magazine rack...I picked up her magazine, and I have to say, I really like it! I may have to subscribe.

Friday, September 26, 2008

Flower Arranging

I think I mentioned I pretty much suck at flower arranging...so when I saw this table with these gorgeous flower arrangements, it gave me a little hope that I can create something beautiful. I particularly like the use of the brown branches and big bunches of flowers like hydrangeas. Aren't they lovely! Not to mention their table set up...WHITE PLATES!!!


Photo from Britssy

More Amy Atlas

I can't stay away from the Amy Atlas site...the pictures are just too beautiful! Look how perfect these tables look. I am so taking myself to task to try to make my halloween table look organized like this...because it is so visually stunning!

Her use of color is so smart and simple but so gorgeous!


Gourmet Cupcakes

Cupcakes are all the rage these days, and with cupcakes as beautiful as these, it is easy to see why. I just found the Cupcake Goddess Blog and saw these gorgeous cupcakes. This blogger actually owns her own cupcake business in the DC area called Couture Cupcakes and I just had to share!


Thursday, September 25, 2008

Mini Layered Cakes

How cute are these? I just read about Cake Monkey in the latest BizBash email. How cute would it be to make some mini cakes like this. Just bake a big sheet cake, cut out some rounds with your biscuit cutters, layer and frost them, add a little sprinkle of chocolate shaving or coconut...walah...your very own mini layer cake for each guest. Adorable. These would impress any dinner guest!


Coconut Cake
Brown Butter Cake with Housemade Caramel,Toasted Coconut and Shredded Coconut Frosting


Cake Monkey Crunch Cake
Banana Cake with layers of Housemade Toffee Crunch and Milk Chocolate Frosting


Dark Chocolate Mint Cake
Chocolate Cake with Housemade Chocolate Wafers and Dark Chocolate Mint Frosting, topped with Cake Monkey Chocolate Pearls


Coconut Cake
Brown Butter Cake with Housemade Caramel,Toasted Coconut and Shredded Coconut Frosting

Halloween Table: Amy Atlas

I so pleasantly discovered Amy Atlas yesterday and she took my breath away. I had a smile from ear to ear and with every click of my mouse thru her "Eye Candy" gallery. Her styling is amazing and simple color choices and attention to detail is impeccable.

Check out this beautiful Halloween Treat table...


I love the centerpiece tree! Notice how she breaks up the food, so that it is balanced on both sides of the table. The table is neat and organized...just beautiful!


Check out the boxes underneath the ghost cakes...probably just a gift box, wrapped, with a little ribbon. These displays don't have to be expensive to look great.


Cute glassine bags with goodies inside hang from the tree with bright wax twine. The lanterns above bring in so much color too.

Wednesday, September 24, 2008

Getting the look of Dept. 56

Department 56 is really known for their Christmas Villages, but they also have some great Halloween decor. Here is a tutorial on how to set up a Dr. Frankenstein Table:


Frankenstein's lab
Learn the tricks of the trade and create your own Frankenstein's Lab. Using trays, ceramic dishes, eyeballs with sayings and candy jars all from our Frankensteins' Lab line, you will be sure to have all the ghoulish goods to make Halloween more fun than you ever thought it would be.


Supplies:
Misc. large mouthed glass jars – apothecary jars, pantry jars etc.
Food items to create "Science specimens" such as:
- Cauliflower or cabbage head for brains, we used orange cauliflower
- Sea sponges for brains
- Cooked ramen noodles, or spaghetti noodles for intestines
- Pimento stuffed olives for eyeballs
- Tea bags for tinted water
- Food coloring, regular or neon for colored water
- Toothpicks


Step 1:
Assemble misc. glass jars and food items for specimen jars:
-Place water in jar and tint to desired color with tea or food coloring.
-You can add food coloring to the noodles directly and toss in a bowl to tint the noodles themselves. Then add them to tinted water. We tinted the ramen noodles brown and red, and then placed them in greenish water.
-Arrange olives on a plate w/ toothpicks to create a 'pile' of eyeballs.


Step 2:
Arrange to create a spooky setting on a tabletop. Add tea stained gauze and spider webs to add more atmospheres.


Step 3:
Prop with additional props like an old Doctor Bag, old rusty hand tools and old books.

Saturday, September 20, 2008

Easy Flower Centerpiece

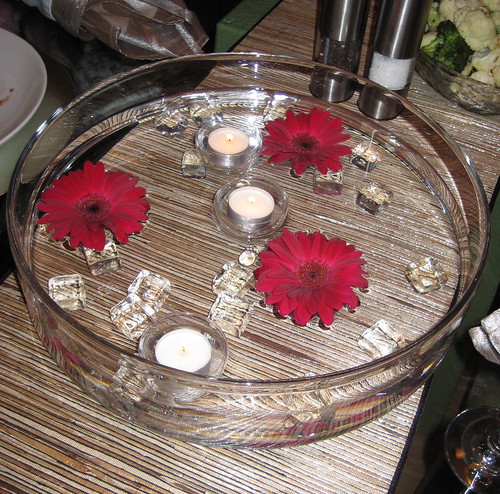
I am so not good at arranging flowers, so this is just my style. When my brother Louis was visiting, we found this HUGE glass bowl at the Pottery Barn. It was originally priced at $49. I got it for $11.99! WHAT! Exactly.

Louis thought I shouldn't pass up the deal, and I totally agree! I think if we were in his town, he would have taken it for himself. It is so heavy!

When Steve and Gina came over, they brought me a bouquet of beautiful gerbera dasies, so, I pulled a few out to make this arrangement for dinner the next night.

IMG_0306

I picked up the little glass ice cubes a few years ago at Old Time Pottery, which is a big warehouse of joy! Haha... I have used them quite a bit. They add sparkle and reflect light from candles. Perfect to just scatter down the center of a table like I did here:

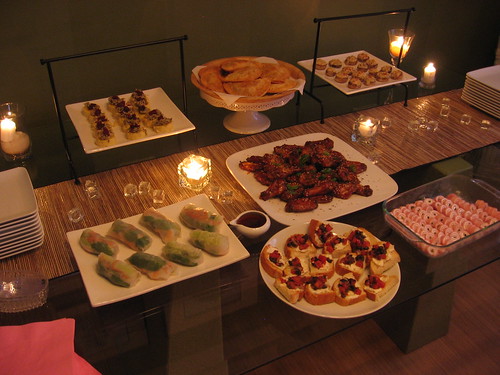
Girls Party Buffet